
Core Exercises guide
The purpose of this article is to provide readers with a resource of knowledge to refer to when making decisions on what exercises to choose to best improve core strength. A comprehensive breakdown will be presented on all major and minor muscles of the core and what exercises serve the most benefit to each of these areas. These teachings will give the reader a very clear understanding of what exercise is best for what muscle to maximize their training time. This article is very detailed and organized; an easy read for the layman and an excellent resource for professionals in the fitness field. At the end of the article, a sample program will be available that will integrate exercises to effectively improve core strength and stabilization.
1/ Plank Variations
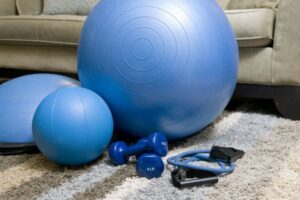
The Classic Stability Ball Plank In this exercise, you can begin by placing your forearms on the stability ball, ensuring your elbows are aligned under your shoulders. …
Forearm Plank Variations.
The Forearm Plank Hold.
The Forearm Plank with Leg Lift.
Rocking Plank.
Low Plank/Knee Plank:
This is a great exercise for beginners. It works the same muscles as the regular plank, but it is a bit easier. The form is the same as a regular plank, but instead of rising up on toes, one rises up on knees. Keep a straight line from head to knees.
Side: Lie on one side with legs extended and feet rested on one another. Bend elbow directly under the shoulder. Rise up on elbows and feet, forming a straight line from head to heels. Repeat on the other side.
Regular: Lie face down with legs extended and elbows bent directly under shoulders. Feet should be hip-width apart. Rise up on toes, forearms, arms, and form a straight line from head to heels.
Planks are one of the best exercises for core conditioning, but if you’re not doing them right, you’re missing out. This timed static exercise can increase core, back, shoulder, and arm strength. The plank is great, but diversity in strength exercises is important, so we have collected 5 different plank variations for beginner to advanced. With each exercise, remember to keep the hips down and the core tight.(1)
2/Dead Bug Exercise
How to perform the dead bug:
Lie on your back and get your arms and thighs perpendicular to the ground. Your knees should be bent at 90 degrees. Get into the starting position by taking a big breath in and then exhaling and bracing your core, posteriorly tilting your pelvis to flatten your lower back into the ground. Imagine that you are trying to leave an imprint of your spine into the ground. This also functions as the finishing position for the exercise.
Now, lower your right arm behind your head and continue sliding it back on the ground as far as possible while simultaneously straightening your left leg and lowering it to the ground. Only go as low as you can go while maintaining the position of your lower back into the ground. If your lower back comes off the ground – that is your end range of movement. You have now completed one rep of the dead bug. Return to the starting position and then repeat on the opposite side.(2)
The dead bug exercise is awesome and is probably my favorite anti-extension exercise to prescribe people. It’s a great exercise to get people to brace through their core while moving at the upper and lower extremities. This is important to be able to do, as many daily tasks and sports require us to do this. In the below sections, I’m going to break down how to do this exercise as well as some regressions and progressions.
3/Russian Twist
“Russian twist” is an exercise which builds strength and flexibility in the torso. Athletes and those who require a lot of body control have used this exercise to keep their midsection in peak performance, crucial for optimal function in many sports. This is a powerful exercise for the rectus abdominis, obliques, and transverse abdominals. This exercise can be done with bodyweight alone, or for increased resistance, holding a weight plate or dumbbell. Take caution if going for heavier resistance; a spotter may be required to hand the weight to you as getting into position can be difficult with a heavy weight. Sit down and bend your legs, elevating your feet slightly off the ground. Lean back slightly to engage the abs. Twist your torso to one side and tap the floor with the weight, then twist to the other side. This simple exercise will hit your obliques hard, and you can systematically increase the weight as you get stronger. (3)
4/Bicycle Crunches
Too many people use this exercise and do it incorrectly. To get the best workout, you must concentrate on bringing your rib cage to your pelvis, which will bring your shoulder blades off the ground. The most common mistake is simply to pull on your head with your hands, causing a strained neck. This could also be caused by trying to go too fast. Bicycle crunches, again, should be done slow and controlled. At first, one set of eight to fifteen repetitions. Try two sets, resting for 30 seconds to a minute in between. High burn, great abs, excellent.
Bicycle crunches are rated as one of the best exercises for your abs. To begin, lie flat on the floor with your lower back pressed to the ground. Place your hands slightly on either side of your head, do not lock your fingers or pull the head. Lift your knees up to about a 45-degree angle. At first, slowly go through a bicycle pedal motion, alternately touching your elbows to the opposite knee, twisting back and forth. Remember to do this slowly and feel the burn. Oh my God, fifteen of these and you will feel the work.(4)
5/Bird Dog Exercise
Learning to brace the core is when this exercise is done correctly. The bird dog exercise is a maneuver familiar to many physical therapists and CrossFit trainers. The person doing the exercise is positioned on the hands and knees with the hands directly below the shoulders and the knees directly below the hips. The back is set in a neutral position and the abdominal muscles are braced. It is important to find the neutral position of the spine to perform this exercise correctly. Imagine trying to balance a glass of water on the lower back. The goal is to prevent tipping the glass while doing the exercise. Now, while breathing normally, slowly extend the hip and knee of one leg. The thigh, hip, knee, and foot should move together while trying to minimize movement in the rest of the body. Once you accomplish this, slowly return to the start position and repeat with the other leg. This exercise helps teach stability of the lumbar spine and pelvic positioning. This will help keep the back safe and injury-free throughout all activities in life.(6)
6/Mountain Climbers
The standard mountain climber described here is a solid exercise, but there are a few variations that can increase the difficulty and recruit even more core muscle. Try them out sometime if you’re looking for a new challenge.
Mountain climbers actually mimic the motion of climbing a mountain and also help develop agility, coordination, and core strength. They really bring a unique challenge to your core and are one of the best ways to improve control and stability. Due to the explosive nature of the exercise, they also offer a cardiovascular element and will increase hip flexibility over time. The major benefit here is the general core strength improvement; it targets the upper and lower abdominals, obliques, and lower back muscles. Due to the duration of an adequate set, climbers also strengthen the shoulders and develop endurance in the hip flexors.(7)
Mountain climbers are a killer exercise because they require strength and stability in your core, something we covered in the how to breathe section. But the moving plank-like motion is a whole different animal that will bring the strength and stability of your core to the next level. In the pushup position, with your body forming a straight line from your head to your ankles, bring your right foot to the outside of your right hand. Your hips will drop slightly towards the floor. Now return to the starting position and repeat with your left leg. Alternate back and forth in a smooth, controlled motion.
7/Medicine Ball Slam
Through training power in the core, you will also notice an increase in strength with many lifts and movements in other areas of the body.
When performed quickly and powerfully, you will feel a very strong contraction in the entire midsection of the core. From the obliques to the lower abdominals, you will train strength through the entire core with a good emphasis on power. Power is a great focus for core training, as it is an integral area for force exertion in many athletic movements.
On the other hand, it is also common for people to try to perform this movement too quickly, slinging the ball down towards the wall with only slight force so that it will rebound more easily. It is extremely important that with each and every slam, you put out as much force as possible, as if you would like the ball to go through the wall. This is the proper level of intensity for the movement. (8)
First off, this is an explosive exercise and it is important that you place an emphasis on the speed of the movement. If you are not catching the ball on its rebound very quickly after it hits the wall, then you are not performing it quickly enough.
The medicine ball slam is an excellent movement when performed properly and is a great way to train power as well as coordination through the core. However, it can be easy to perform this exercise incorrectly.
Try to repeat this exercise for 3-4 sets of 12 repetitions. It is very demanding and you will find that you can tire yourself out very quickly if you go all out.
At first, you may want to simply let the ball hit the ground and then pick it up again with each slam. However, this exercise becomes more intense when you try to maintain a rapid tempo and continuously catch the ball after each slam to immediately go into the next one.
Begin by standing facing the wall with your feet shoulder width apart. Hold the medicine ball at arm’s length. You will then forcefully slam the ball into the wall and try to catch it on its rebound before it hits the ground.
To perform the medicine ball slam, you will need a fairly light weight medicine ball that can bounce. I usually suggest something in the range of 8-12 lbs. You will also need access to a fairly solid concrete or brick wall that will not break when the ball is slammed into it.
8/ Hanging Leg Raises
The benefit of the hanging leg raise is that it trains the entire abdominal wall and the hip flexors, but leverages the resistance of the legs to add an additional strength and hypertrophy component to the lower abdominals. It is an exercise suitable for those of all levels. Beginners will benefit much from the mastery of a single leg raise prior to the double leg raise, and those who are advanced at the movement can take on additional resistance by wearing ankle weights. Be wary that as a pure strength movement, the hanging leg raises will have some hypertrophy effect on the grip muscles. If one is progressing to hanging leg raise from the captain’s chair variation, they may need to allow time for the grip strength to adapt to the movement before being discouraged by decreased performance.
Hang Leg Raise: You can achieve the same movement purpose if you are unable to hold yourself up on a bar, and it is a good regression on the exercise. A pull-up rig has a horizontal bar between the side bars; one can set up to this bar in a captain’s chair, the best stability ball chair, and compress the core into the same movement previously described. This is an excellent strength training exercise and will often be easy for those who are capable of the leg raise from the bar. (9)
With a medicine ball, 5-10 lbs in weight, between the feet (requires to be held in place), hang from a bar with both arms extended. The legs should be straight with the feet close to the ground. Use the hips to flex the knees, raising the knees to the chest. Once the hips are fully flexed and the knees brought as close to the chest as possible, reverse the motion by extending the knees and flexing the hips. The goal is to control the speed of the descent. A good goal is 3-4 sets of 10-15 repetitions, resting 60 seconds between sets. This will be very difficult at first, and one may not yet have the strength and coordination to control the movement. This is alright, do your best and most importantly use the descent of the exercise as an opportunity to coordinate and strengthen your core. Over time, it will become easier and the technique will improve. It is best to gradually increase repetitions and sets as opposed to immediately doing a large amount, as poor form and high volume is inviting to back discomfort or injury.
9/Stability Ball Rollouts
Start with the stability ball near a wall. This will create an incline and decrease the lever arm of the exercise, making it easier. Stand about 3-4 feet away from the ball. As you get stronger and comfortable with an incline, move further away from the ball to create less of an incline until you are able to do rollouts on an even surface. After doing rollouts near the wall, work at an even surface then try doing rollouts with your feet elevated on a bench. This adds more resistance and increases the difficulty of the exercise. Make sure your back does not sag while doing this exercise. This is a common mistake which decreases the effectiveness of the exercise and increases the risk of back injury. Only go as far out as you can while still maintaining perfect form. Over time, you will become strong enough to go all the way out.
Stability ball rollouts are one of the best exercises for working the entire core. They target the deep abdominal muscles, which help protect the back and improve posture. They also work the obliques, which are important for stability. Furthermore, the lats, traps, and pectorals are worked isometrically, which increase overall body strength and add to core stability. This exercise is really a double whammy because it works the upper body isometrically and the entire core dynamically. Unfortunately, this exercise is very difficult for beginners and those not strong in the core, but there are a few variations to build up to the full stability ball rollout.(9)
10/Cable Woodchop
Avoid rotating the pelvis with the trunk and putting additional load through the lower back. This is an oblique exercise, so the primary line of rotation should be the trunk and nowhere below. Complete this exercise with the sternum facing forwards and alternate between both sides for a fair strength development.
It’s important to remember that when moving anything across the body, the easiest line of motion to take is the one that the handle takes; the hardest line is the exact opposite. This means that the load is least at the start position and increases considerably through the end of the movement. Because of this, the exercise requires the weight during the downward phase to prevent the cable from returning too fast, which will cause loss of control and stability through the body, a common error with this exercise.
To perform, first select an appropriate weight and attach a single handle to a high cable pulley. Stand sideways on to the cable in a split stance and grasp the handle with both hands. The starting position will see the handle next to the outside of the knee of the lead leg. Initiate the movement by moving the handle across the body and up to a position where the arms are fully extended and body posture is still tall. Pause and then reverse the motion back to start, always maintaining the tension on the cable throughout the entire movement.
This exercise is a great way to work unilaterally in both the frontal and transverse planes. In a lot of sporting movements and everyday activities, you will rotate the trunk under some certain load. This exercise assists greatly in proper execution of such movements, as well as providing a great strength exercise for the oblique muscles, grip, lat, deltoid, and all important stability muscles of the core.
11/ Lying Leg Raises
The added resistance for this exercise can be in the form of a weighted belt chaining a dumbbell to your feet, or a partner providing manual resistance. If using manual resistance, the partner should aim to provide force in the opposite direction to the movement, so as to resist leg adduction. This can also be achieved through holding an object between the feet, though this should be experimented with cautiously to ensure it does not place too great a demand on the groin musculature or adductor tendons.
Lying leg raises can be particularly spine intensive too. Performing the exercise with straight legs increases the lever arm of the legs, and therefore the torque about the hips. If you have any history of lower back trouble, it would be prudent to avoid this exercise until you have significantly strengthened your abdominal wall, and even then the straight leg version may be contraindicated.
The last of the floor exercises (before we move onto the ‘hanging’ variations) is the lying leg raise. You can make this exercise easier by bending your knees towards your chest, or more difficult by keeping your legs straight. The movement involves lifting your legs from your hips, ideally without bending your knees, and bringing them perpendicular to the floor, or more ideally, towards your face. This is a great exercise for your lower abdominals, an area often neglected or improperly trained with other exercises. It is important to ensure you are using your abs to perform the movement, rather than momentum from your legs, and to ensure you are in control throughout the full range of motion. A common mistake is to allow the hips to come off the floor as the legs are raised. This is usually a sign that the abdominals are not yet strong enough to perform the full movement and range of motion, and the position of the legs should be reduced so that the hips do not lift.
12/ Side Plank
Coaching Tips:
Keep your head in line with your body.
Let your hips and knees sag to the ground.
Lose your tight seal around your lips. Breathe rhythmically to time your movement, or perform the plank in front of a mirror and match your breathing pattern to the time your body is in the plank position.
Variations: Once you can perform the side plank for 60 seconds, try this advanced variation: Raise the top leg and hold it in the air. If you can balance well, raise the top arm as well. Hold this position for 10 seconds. Repeat on the other side by raising the opposite leg and arm.
Execution: Lie on your right side with legs straight and feet stacked. Prop your upper body up on your right elbow and forearm. Position your elbow under your shoulder.
Brace your core and lift your hips until your body forms a straight line. Hold this position while breathing deeply. When you can hold this position for 60 seconds, switch to the other side.
13/ Reverse Crunches
Lying on your back (not on a bench) with your legs elevated and your hips and knees bent at 90-degree angles, keep your arms at your sides and place them on the floor for support. This is the starting position. Now slowly contract your abs and curl your hips off the floor and bring your knees towards your head. At the peak of the movement, contract hard and then slowly lower your hips back down to the starting position. Note, it is key to keep the legs elevated during the entire set and not to swing your legs back and forth in an attempt to gain momentum. This is the most common form of cheating during reverse crunches and shows the exercise is too heavy. If this is the case, try making it easier by completing the movement as a floor leg and hip raise first, then progress to reverse crunches.
Reverse crunches are an amazing core exercise that targets the lower portion of the abs. Due to the legs being lifted, you are placing more leverage on the abs and allowing for a better contraction of the lower portion of the abs. In particular, this is a great workout that could be used as a progression from the standard floor crunch to a floor leg and hip raise. This exercise could almost be considered an upside-down leg raise as the same movement is taking place, only difference being with leg raises you are targeting the hip flexors rather than the abs.
14/ Ab Wheel Rollouts
The difficulty of this exercise is high and it is likely that you will not be able to do it at first. When you do start the exercise, add it to an abs workout only once a week. 1-2 sets of 8-10 rollouts is an adequate amount when combined with other intense abdominal exercises. Overworking this exercise will actually decrease performance as well as increasing the chance of injury to the lower back and abdominal muscles. As the exercise gets easier, you can hold weight in a backpack to increase intensity. This is not the best exercise to do when aiming to increase athletic performance in the near future. The stress to the core muscles will actually decrease performance in other sports until they have adapted to the movement. So if you are in season for a sport, it is best to avoid this exercise until the off season.
The ab wheel rollout is the most effective core strength exercise according to a study. This exercise works both the upper and lower abdominals. It is a very difficult exercise to perform, so it is necessary to work up to it. Start by kneeling on the floor with the ab roller in front of you. Slowly roll the ab roller forward, stretching your body into a straight position. After a brief pause at the stretched position, pull the body back to the starting position in a controlled fashion. Keep the movement slow and do not let your hips drop at any time during the exercise. Hips dropping is a sign of lack of strength and it means you have gone too far down. Do not extend the body all the way out in the first session. Start by doing a few sets and increase the range of motion in each session until you are performing the full movement. This exercise can also be performed from a standing position, extending the ab roller against a wall. This is actually a good way to progress to the full exercise.
Summary
Listed above are the best core exercises as rated by an EMG (electromyography). What I then did was create workouts from the exercises to set up a diverse routine for someone looking to strengthen their core. I did 3 workouts, but keep in mind you can mix and match exercises to create more routines!